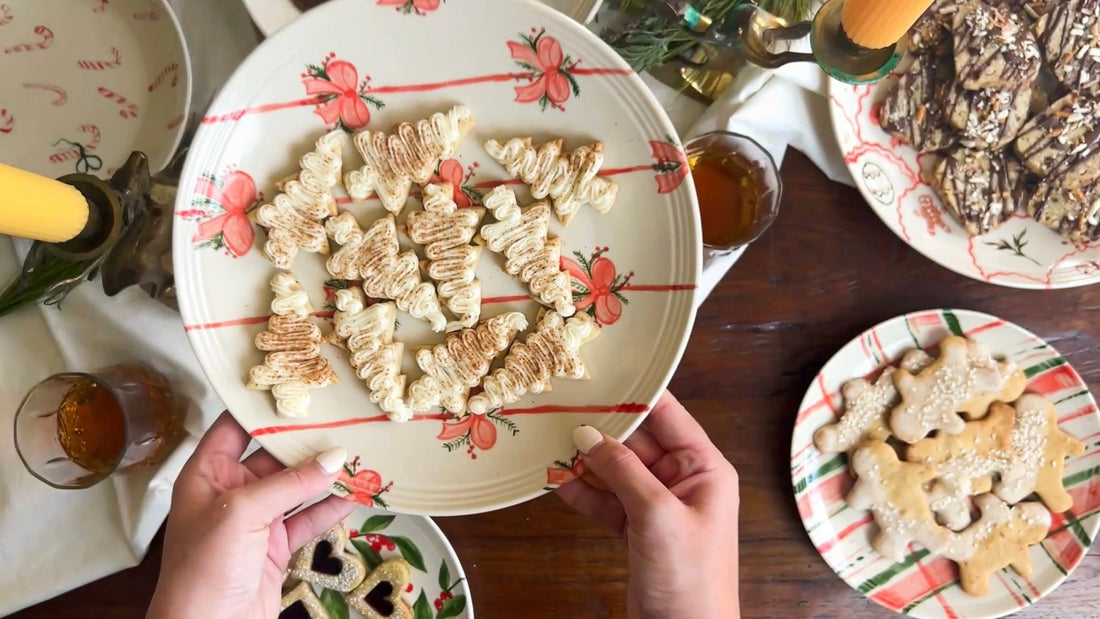
I wanted to wrap up our 12 Days of Cookies extravaganza with something symbolic of the Christmas season. Which led me to Eggnog Cookies decked out in a velvety layer of Eggnog Frosting. Of course, this recipe is anchored in the simplicity of our trusty Basic Butter Dough.
Each buttery bite is intricately woven with comforting notes of nutmeg and eggnog, all crowned by a frosting that encapsulates the epitome of holiday indulgence. It's the grand finale, a nod to cherished traditions.
Eggnog Origins
Eggnog, is a creamy concoction that has become synonymous with holiday indulgence. The origins of the libation can be traced back to medieval Britain, where a warm ale-based drink known as "posset" gained popularity during winter. As this tradition crossed the English Channel, it underwent modifications in the 17th century, with the incorporation of eggs and milk becoming commonplace. The term "nog" potentially originated from "noggin," a small wooden cup traditionally used for serving alcoholic beverages.
The introduction of eggnog to the American colonies occurred through the influence of European settlers, adapting to local tastes and ingredients. In the New World, the drink took on a spirited character, often incorporating rum, brandy, or whiskey.
By the 18th century, eggnog firmly entrenched itself as a festive beverage associated with the winter holidays, particularly Christmas and New Year's Eve. Its popularity continued to grow, evolving into a cherished tradition in both the United States and Canada.
Eggnog's global journey resulted in various regional and cultural adaptations, from the Puerto Rican "coquito" with coconut milk and rum to the German "biersuppe," a beer-based variation. The choice of spirits and spices contributes to the versatility of this beloved drink, allowing for a personalized touch.
In contemporary times, eggnog has transcended its liquid form, inspiring a myriad of culinary creations, including eggnog-flavored desserts like our eggnog cookies, ice creams, and more. Eggnog remains a symbol of festive warmth and gaiety.

Eggnog Icing
Ingredients:
1/8 cup of Butter, softened
1 ½ cups of Powdered Sugar
3 Tbs of Eggnog
¼ tsp of Vanilla Extract
Instructions:
With a stand or hand mixer, beat the butter until smooth.
Add in the eggnog and vanilla and mix.
Pour in the powdered sugar and mix until fully combined and smooth.
Tips:
- Room Temperature Ingredients: Allow your butter to come to room temperature before making the frosting. This ensures a smoother texture and easier incorporation of other ingredients. Room temperature ingredients result in a creamier and lump-free frosting.
- Gradual Sugar Addition: When adding powdered sugar to your frosting, do it gradually. Add it in smaller increments, allowing each addition to fully incorporate before adding more. This method prevents clumps and ensures a silky texture. If you're using a stand mixer, start at a low speed to avoid a powdery sugar explosion.

If you missed the cookie number 11 click here. And while your'e here, check out these hand painted cookie plates.
Eggnog Cookie Ingredients
- Prep: 20 minutes
- Cook: 15 Minutes
- Total: 35 Minutes
- Serving: 1 Cookie
-
Yield: 20 Cookies
Ingredients
- Prepared Basic Butter Dough
- Prepared Eggnog Frosting (see above)
- 1/8 tsp of Nutmeg
- ¼ tsp of Cinnamon

Directions for Eggnog Cookies
- Preheat your oven to 350°F (175°C) and line baking sheets.
- Mix cinnamon, and nutmeg into basic butter dough with a stand or hand mixer.
- Once fully incorporated, roll the dough out and use a cookie cutter to cut out your cookies.
- Bake the cookies for 15 minutes
- Let them cool completely on the baking sheet before moving them to a cooling rack.
- Once cooled, pipe on icing.
- Enjoy!
Notes:
Psst! These cookies can also function as a simple slice-and-bake recipe. If that's more up your alley, roll the dough into a log, wrap in cling wrap and put in the fridge until solid. Then pull it out and slice away!