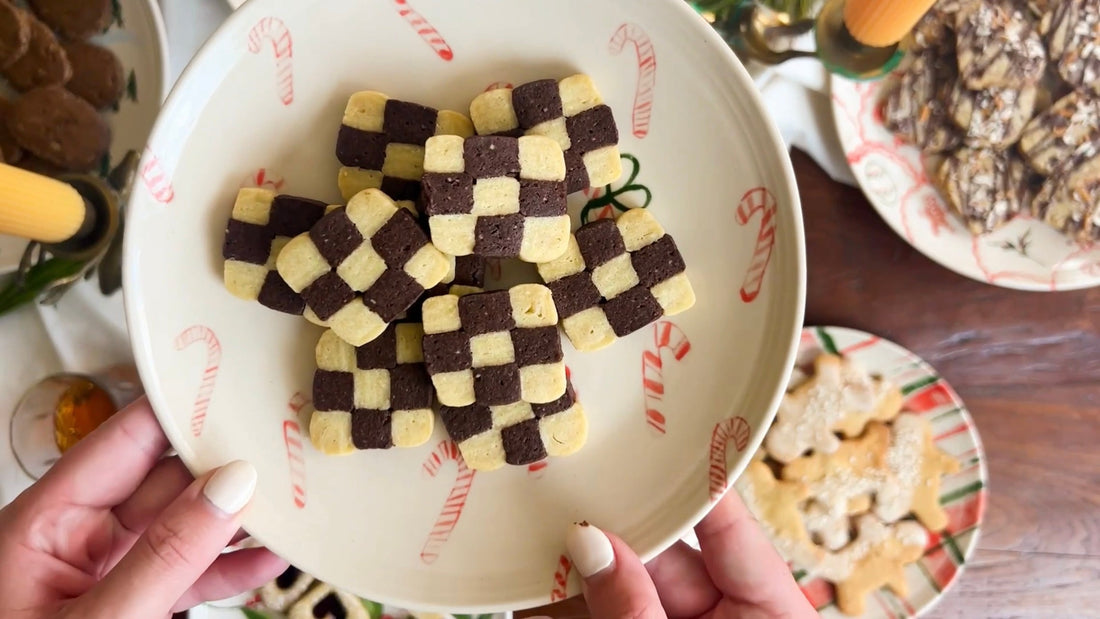
Checker Cookies have stood the test of time, becoming a cherished part of holiday celebrations and special occasions. Whether stacked in gift boxes, served at tea time, or displayed on dessert tables, these cookies evoke a sense of nostalgia and delight. Make sure to check out the Basic Butter Dough recipe to get the base recipe for this cookie.
A Checkered Past
Checkerboard cookies, also known as harlequin or checker cookies, boast a charming and visually striking appearance that has captivated bakers and cookie enthusiasts for generations. While the exact origins of checkerboard cookies are somewhat elusive, their unique design has been associated with various cultural traditions.
One theory traces the checker pattern back to medieval European culinary practices. During this time, intricate geometric designs were often incorporated into baked goods as a form of edible artistry, showcasing the skills of bakers and delighting the palates of nobility. The checker pattern, with its alternating squares of contrasting colors, might have been a symbol of sophistication and craftsmanship.
Another line of thought ties checker cookies to the Jewish culinary heritage, particularly during festive occasions such as Hanukkah. It's suggested that the checker pattern became a representation of the dreidel, a spinning top associated with the holiday. The alternating layers of dough mimic the dreidel's sides, adding a playful and symbolic element to these delectable treats.
As checker cookies made their way to different regions and cultures, variations emerged, each putting its own spin on the classic design. The combination of buttery vanilla and rich cocoa layers became a hallmark, creating a harmonious blend of flavors to complement the eye-catching visual appeal.

Stay tuned for the next cookie in 12 Days of Cookies! If you missed the cookie number 9 click here. And while your'e here, check out these hand painted cookie plates.
Checker Cookie Ingredients
- Prep: 50 Minutes
- Cook: 15 Minutes
- Total: 65 Minutes
- Serving: 1 Cookie
- Yield: 25 Cookies
Ingredients
- Prepared Basic Butter Dough
- 3 Tbs of cocoa powder

Directions for Checker Cookies
- Preheat your oven to 350°F (175°C) and line baking sheets with parchment paper.
- Divide the Basic Butter Dough in half.
- Mix the cocoa powder into one half of the dough.
- Roll each portion (one vanilla, one chocolate) into two rectangles of the same size. They should be about 1/4 " thick.
- Slice each portion into five equal strips.
- Stack the strips to form a checkerboard pattern, pressing them together gently as you go.
- Continue until you have three layers. You will end up with an extra strip, toss it or bake it up as a little “chefs cut”
- Wrap the assembled dough in plastic wrap and refrigerate for at least 1-2 hours, or until firm.
- Once firm, slice the cookies into about ¼" slices
- Place the cookies on a parchment-lined cookie sheet.
- Bake for 12-15 minutes.
- Allow the cookies to cool on the baking sheets before transferring them to wire racks.
- Enjoy!
Notes:
If the dough becomes too dry to work with after adding the cocoa powder, just mix in more softened butter.